I have just returned from five enjoyable days studying paper collage under American artist Donna Watson. Fabric is my medium, but I have become interested in the past couple of years in including paper with fabric. In particular, I am enjoying exploring Japanese paper (washi – 和紙). When strengthened with konnyaku it can tolerate immersion dyeing. This is my favourite piece from the five days. Donna is an excellent teacher – if you get a chance to study with her, I recommend it.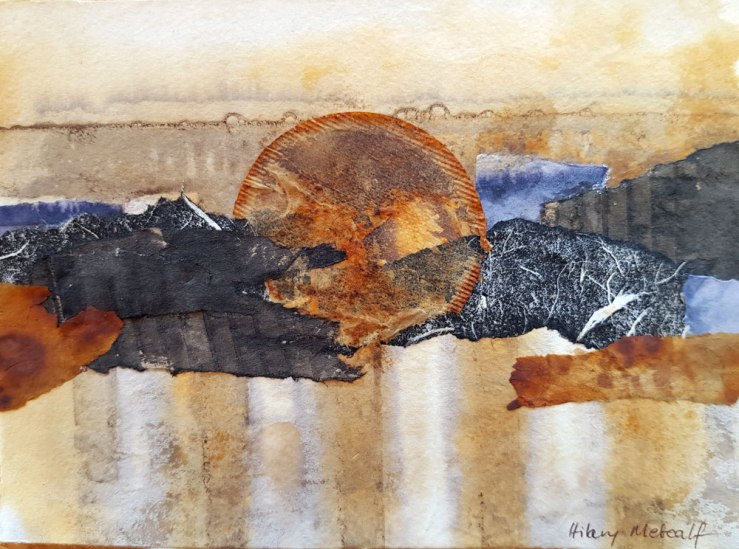
Category: rust dyeing
Ready, set go..
I am all packed for Fibre Arts at Sale. I have probably packed too much stuff, but you never know what you are going to need. Here are some collage and printed cards I have made to sell at the traders market.


Fibre Arts Gippsland
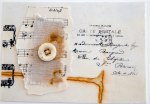
I am off to Sale on Tuesday for a four day collage workshop with Jette Clover. Fibre Arts run a fundraiser where they sell donated pieces of art. Here are my contributions. Rust and encaustic.


paper, encaustic and rust
Small things
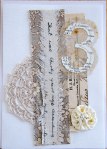
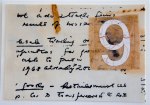

I like making small things – they are quick, no big investment in time or materials and very satisfying. You can sort of work in a series doing lots of small things in a row to work through an idea. These cards bring together my love of working with rusted fabric, snippets from my embroidery and a few new techniques. Although not a scrapbooker, I have recently peered into that world and discovered a thing or two that is handy. A Cutttlebug paper embosser for one, that allows me to add some embossed detail to cards to combine with lace and bits. The last two cards have been embossed.
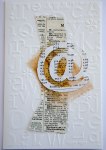
The numbers 3 and 9 and the ‘@’ were all cut with a an electronic stencil cutter – these are way too much fun and have great potential for surface design.
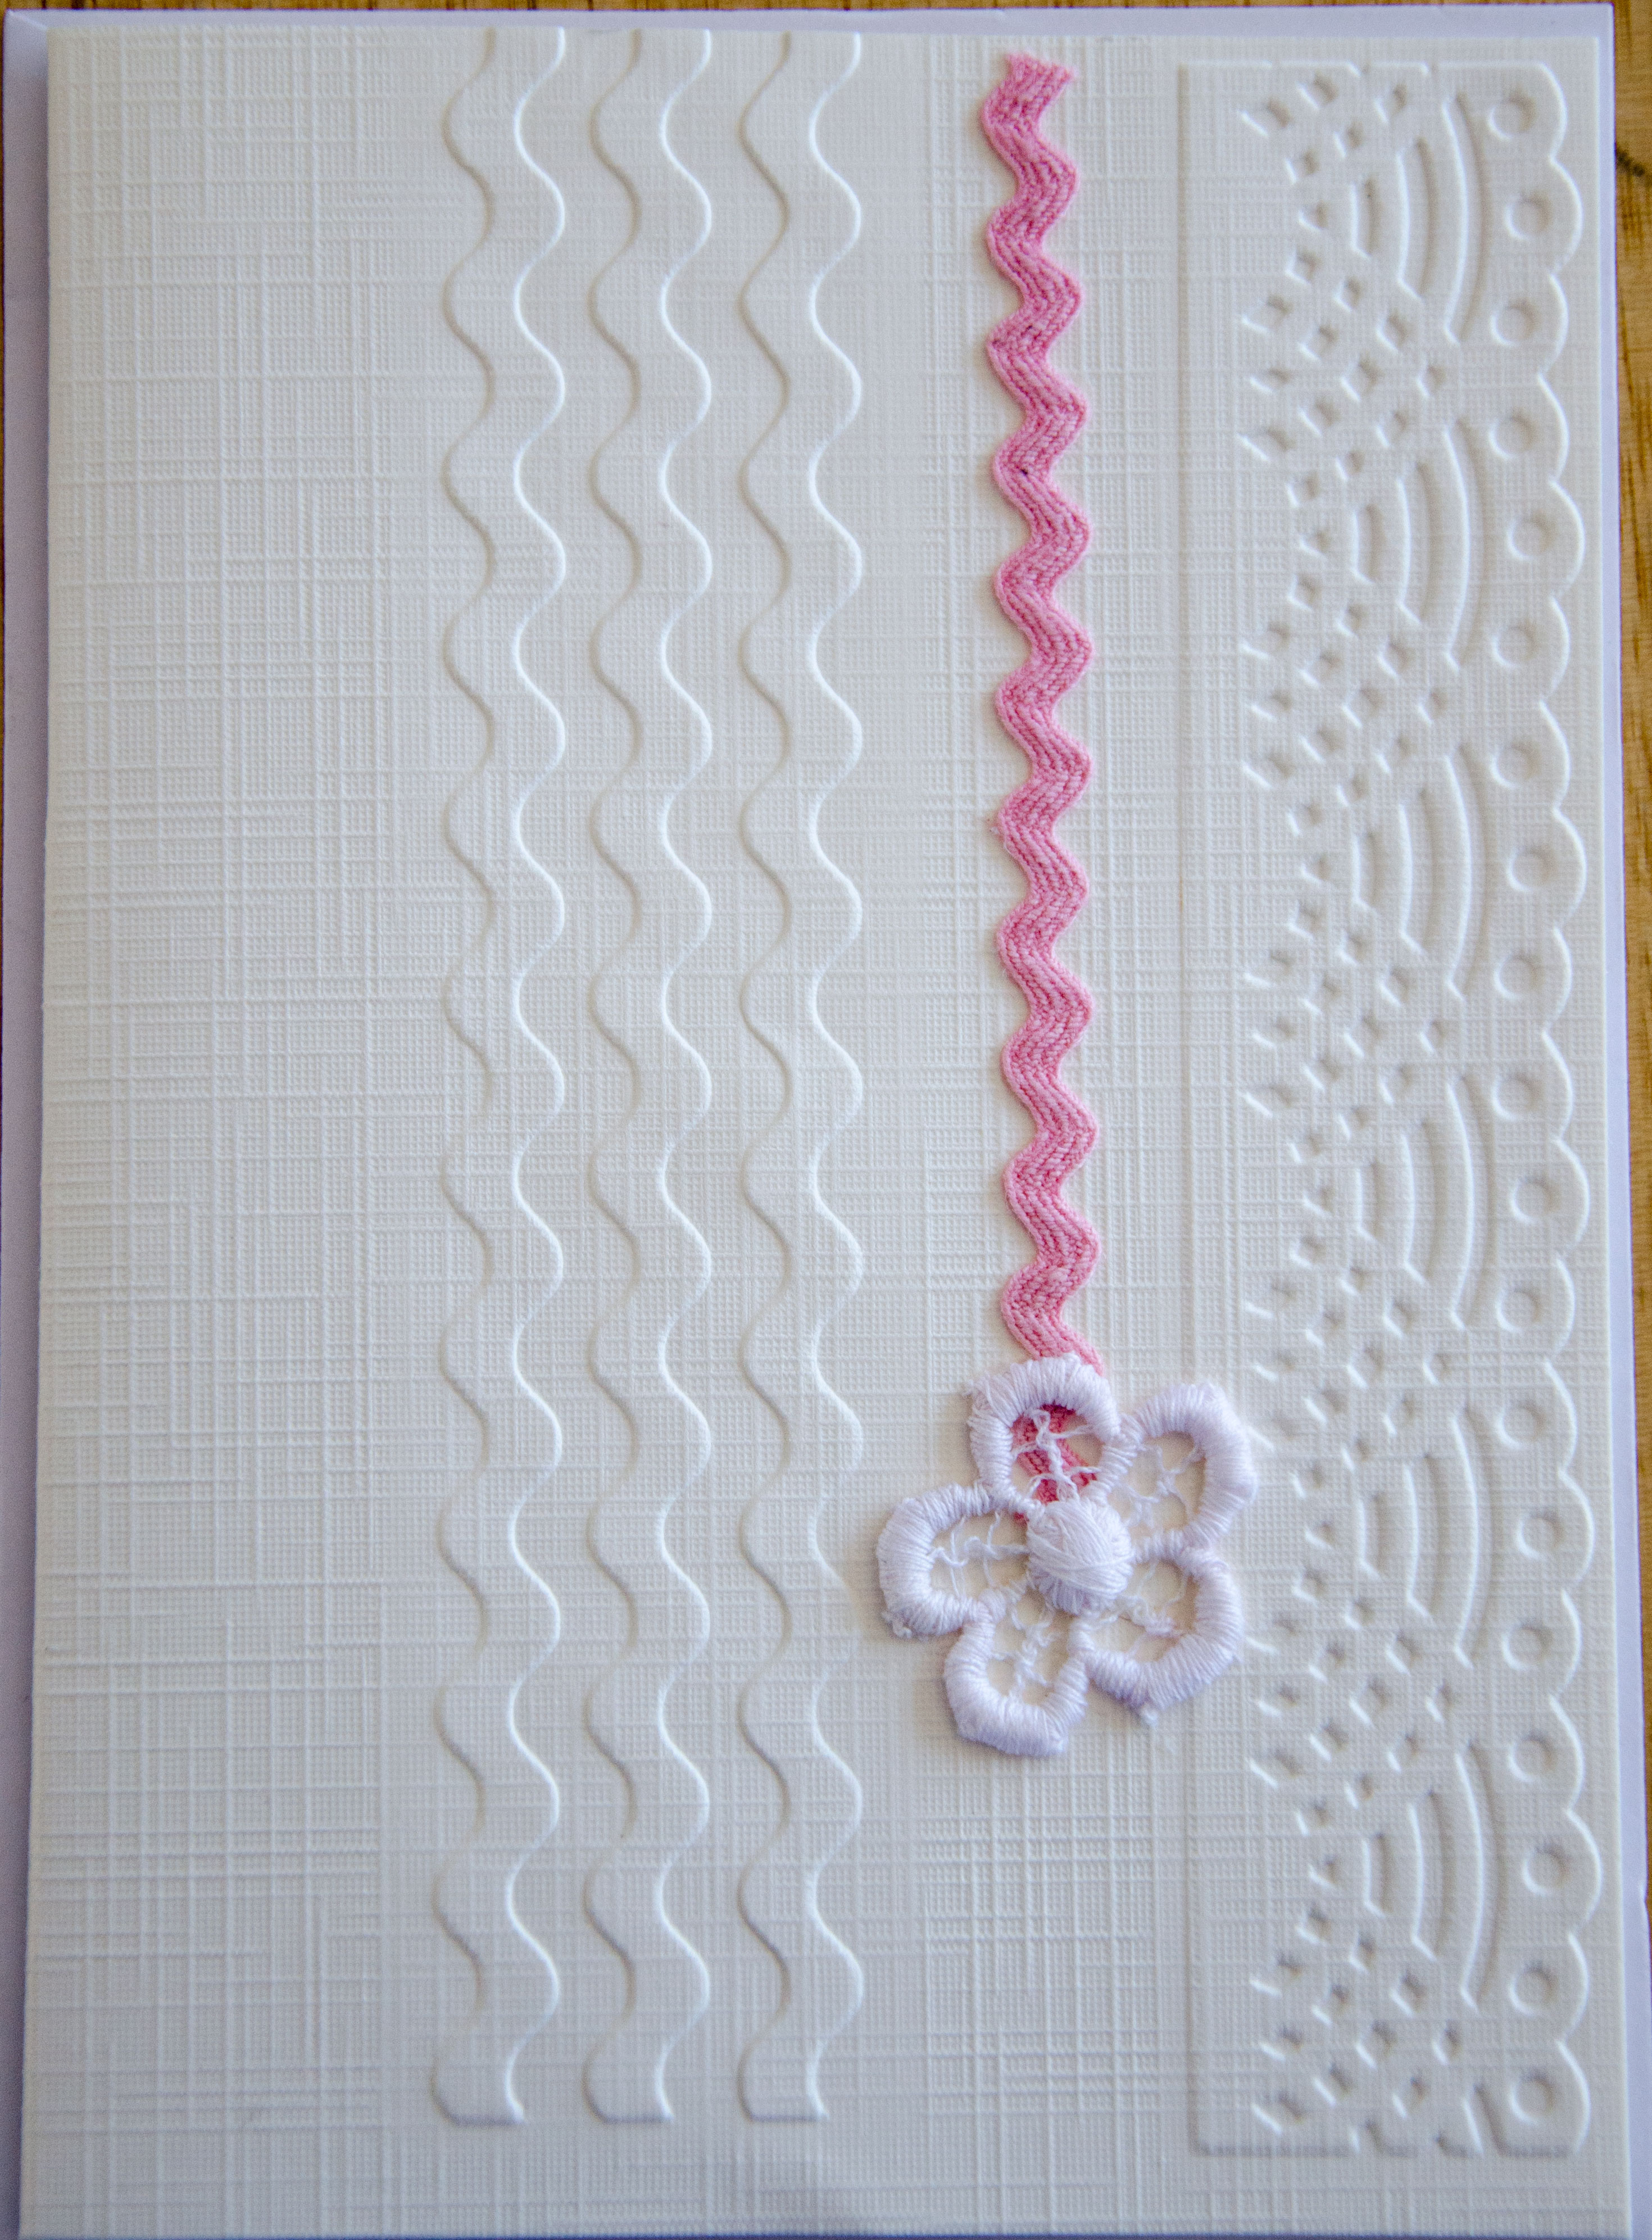
This little card was inspired by Helen Smith’s work. I don’t have the sort of printing press that she does, but after a bit of research discovered the Cuttlebug – lots of fun! Technically I think what she did is called collograph printing, whereas I embossed – suspect there is a subtle difference there, but don’t know enough about it!
Breakdown printing results, and, rust dyeing

Here is the result of the breakdown printing I did from the screen I prepared a couple of days ago. I am somewhat underwhelmed by the outcome.

This piece started at the drop cloth under the screen while it was drying. Then I printed over it with the screen. Again, fairly underwhelming. I like the idea of this style of printing, and I have seen some wonderful examples -clearly it takes time and planning to get good results, although I also understand that part of the appeal is that you can’t plan too much, and there is a significant element of serendipity and surprise. I guess right now, I am looking to focus on things that will help me produce the sort of work I have had in my head for a long time – and right now, this technique isn’t going to help me achieve that, so I am happy to put it aside.
I did however get to try another one of those ‘must give that a go sometime’ things – rust dyeing using iron sulphate, tannin and lye. There is an excellent tutorial here, which I followed (more or less). If you visit, follow the links to Lynda’s (Purple Missus) blog where she tried it too – lots of wonderful photos.
Here are my results

This piece started off as a failed early attempt at breakdown printing using thickened dye – just about anything would make this look better, so I had nothing to lose.


This was the hand dyed piece from yesterday that I monoprinted on from the last of the gelatin plate. It was already dyed in blue/orange, so this treatment just enhanced those colours.


This piece started off as a traditionally rusted piece which was a bit eye-poppingly orange for my taste, and the contrast with the stark white background was too much. I much prefer this version.


I need to go and buy a cheapo iron so I can iron this lot – I only have my good one here – the other one is in the apartment.
Tomorrow’s activity – some more rubber stamp carving, I think.
Looking forward – looking back

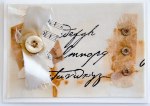
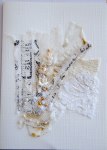
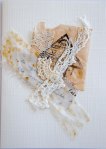
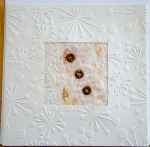
First, looking back. Today is the last day of the year and this day is always tinged with sadness for me, as it is the anniversary of my mother’s death – seven years ago now. I have been feeling restless and annoyed that I am not producing anything, while at the same time whining endlessly about not having time to do anything. So today I resolved to make a small piece in the style of Lesley Riley’s fragments to honour my mother.
I wanted to use some of the rust dyeing I have done recently -so used a piece of silk organza and some wide silk ribbon that I quickly rusted up. I transferred a favourite photo of her aged about 3, with teddy, using solvent, onto some smooth shiny fabric to get a clear print. Then I had to decide what fabrics to put with it. One of the limitations of rust dyeing is that it is orange – no two ways about it. I had previously paired some rust dyes with blue, the complement of orange, but didn’t want to use blue in this piece, so was scratching my head, when my eye fell upon an article by Lesley Riley in a recent CPS on rust dyeing. She had done a piece in rust dyes, purple and aqua and I suddenly realised I should have been thinking of a triadic colour scheme – which would give me much more scope.
So, I rummaged in the scrap bag and quickly found some pieces. I had a beautiful piece of lace that I was determined to use, but alas no matter what I did it just didn’t seem to work. In the end I discarded it in favour of the scallop trim which seemed to fit better. Along the bottom are five little flowers cut out of copper tissue with one of those little stamper cutter thingies you get in scrapbooking stores. On to the rust dyed ribbon I transferred her family motto ‘”to the valiant heart, nothing is impossible”. In retrospect, I should have used a slightly larger font, but it does invite the viewer to move in close to read it. All in all, I am happy with this piece, and glad I just told myself to ‘do it’ and stop procrastinating.
As for looking forward – I plan to take more of the ‘just get on with it’ approach in the coming year. I am signed up for Liz Berg’s class and she has a good line in just do it, work quickly, produce the work. I also have realised I have to accept Rayna Gillman’s sage advise to accept the crap quota. Apart from a tendency to over analyse, I also tend not to want to start something until I am sure I am going to get it exactly right. This is a terrible trap, because of course half the time I don’t start, and when I do, and the end result is not perfect, I get very despondent. Rayna’s advice is accept that there will always be a crap quota – do the work – lots of it – sift through the crap and find the gems – the more you do, the more gems you’ll get.
So – that’s what I will try and do more of in 2008 – and if you hear me starting to whine about not having enough time, feel free to give me a very sound telling off.
Happy New Year
More rust dyeing

Oh dear, haven’t blogged for a while. I delivered the baby quilt I showed in my last blog, and have a new one up on my design wall – nearly have it finished – I started ages ago and just needed to make a couple more blocks to have enough, then cut the setting triangles. It is a sort of old fashioned looking basket block pattern that just appealed. I do like setting blocks on point and alternating with a solid block – the diagonal set has more life and movement, and it means you only have to piece half as many blocks! Will try and get this top finished this weekend. Then it can come down and make way for this one which is waiting in the wings. I bought some indigo fabric ages ago, with a view to making a classic blue and white quilt. I cut out all the pieces, but never got very far – and now I can even remember what pattern I was going to do. But I have lots of small squares, so started making half square triangles and putting them together into pinwheel blocks. These are only five inches finished – what was I thinking? Oh well, it will get finished eventually. Maybe I will group four together to create a 10 inch block, and sash with indigo between??

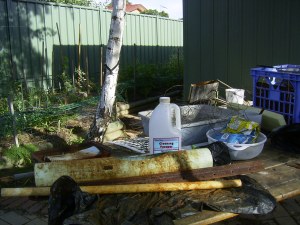
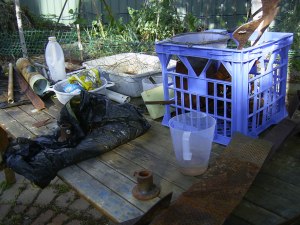
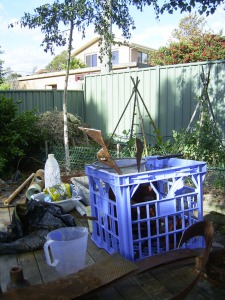


I have been doing some more rusting – the weather is hotting up here, so very suitable. Here is my set up at the end of the garden.


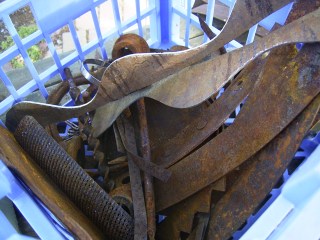
My husband has really got into the spirit of this and has been bringing me home all sorts of bits and pieces that he collects on his walks.


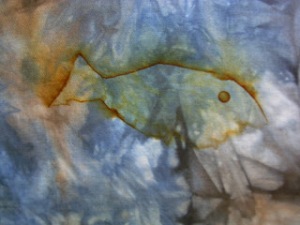
He got creative and cut me some fish shapes out of some flat metal. Here they are sitting on some previously rusted and hand dyed fabric.


And here is what it looks like after sitting for a day or two. My husband thinks the fish looks a little deranged, although quite how one assesses the mental state of a fish I really don’t know. Maybe it isn’t the fish that’s deranged!?
The next piece was covered with steel wool, then wrapped around a piece of PVC pipe and tied with copper wire. You can just see the black at the top that comes from the interaction between the copper and iron. I’d actually like more black and less orange.

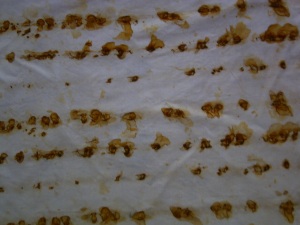
This one was also wrapped around some pipe and tied with steel wire – not sure what caused the blobs. I like this one better because it isn’t so orange – I might overdye this one, or add some more surface design with paints or inks, or screen printing or something.


this last one was interesting too – wrapped around a star picket – which you can see in the first photo, laying between the pvc pipe and a piece of dowel – and tied with copper wire – I got rows of blobby bits where the fabric touched the picket and it stayed white where it didn’t- another good candidate for overdyeing.
